The following are the steps I followed in creating Episode 15 of Jack in February, 2006.
I'm presenting this new(er) feature on the procedure I follow in creating Jack because the original one has become out of date in a couple of significant ways. Also, I thought I might be able to show more of the steps with a little more detail by taking photos as I worked rather than stopping to make scans. Some of the photos aren't of fabulous quality, but hopefully they're good enough to get the idea across.
One warning: I do rattle on at length about some of this stuff, because it's the sort of thing I enjoy reading about other cartoonist's work. I hope you're interested...
Studio
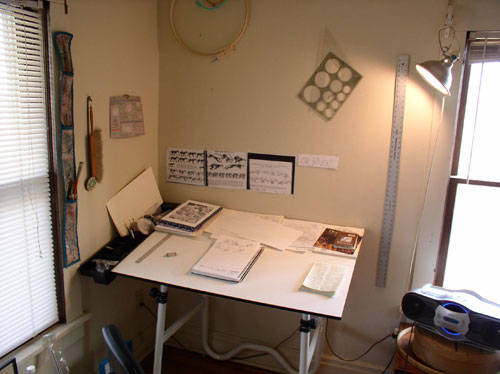
First off, here's a shot of my corner of our studio, which I share with my wife Ellen. Her drawing table is off-screen to the right, facing the other wall.
The image sequences taped to the wall are run and walk cycles from Preston Blair's incredibly helpful book, "Cartoon Animation". They have been an invaluable reference for leg positioning in action drawings. The hardest part for me in drawing four-legged characters has been in getting the two pairs of legs to look right together. I can easily do the front legs, or the back legs, but when I have to show all four together, it can turn into a clumsy mess. I've gotten better at it over the last couple of years, and now rarely have to refer to these pages. But they're still on the wall, just in case.
I also now have an actual lamp attached to the table!
Tools
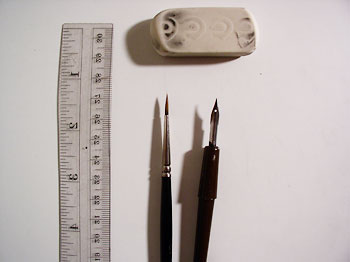
Oops, I didn't show the pencils. I do all of my sketching with HB pencils. They're soft enough to get a good dark line if I want it, but hard enough so I can draw on both sides of my sketchbook pages without the graphite smearing or transferring too easily. I always use Staedtler Mars Lumograph pencils, mostly because they're so attractive. I love that blue-sided pencil!
For the final drawing, I use a 2H pencil (any old 2H - not a lovely blue Lumograph - this is so I don't pick up the wrong one by mistake, which I would, all the time). Drawing lightly with the harder 2H, I find it easier to avoid graphite build-up, making erasing quicker and more pleasant.
For inking, I use a combination of a Hunt 107 pen nib and a #1 Winsor & Newton Series 7 Sable brush. More on this during the inking step. I also use a couple of old Winsor & Newton Sceptre Gold Sable/Synthetic Blend brushes for bigger areas of ink wash.
I use plain old waterproof black india ink. Some people have opinions about brands, but I can't really tell the difference so far. I used Higgins Black Magic for a while, but now I refill the Higgins bottle with Dick Blick's Black Cat ink, which came in a bigger jar. One tip that really helps: have a backup ink bottle and constantly refill!! If you keep the ink level high in your bottle, it's easier to see when you dip your brush or pen to control the amount of ink you're picking up. It keeps things cleaner, too.
And last, I erase the pencil lines with a Staedtler Mars white plastic eraser, which is the only eraser I've ever found that will remove ALL the graphite from paper without causing any damage to the paper surface. It's amazing. Unfortunately, it can also remove a bit of the ink and unintentionally lighten brushed lines, so I have to erase pretty carefully.
Script
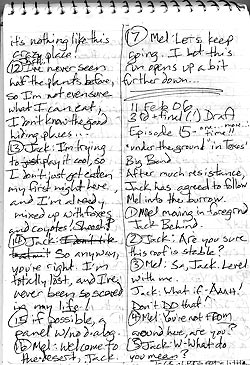
This usually takes a couple of drafts. I try to take a piece of the story that makes a satisfying bit of plot with beginning, middle, end for each episode. Hopefully there will be an opportunity for a decent joke and/or some action.
I shoot for 12-16 panels, and work hard to keep the word count on each panel down to no more than 20 words. Even at 20 words, there's not much space left for the drawing.
On the first draft, I usually just start writing and let the characters say or do whatever they want and take their time about it. This is the way I often discover the jokes: the characters come up with them on their own. In episodes where I'm not sure exactly what's going to happen, I'll sometimes write out whole extra sequences or conversations, following threads to see where they'll go.
In the end, most of the rewriting is actually cutting and condensing, removing panels and words to make this bit of the story work in the available space.
Layout Sketch


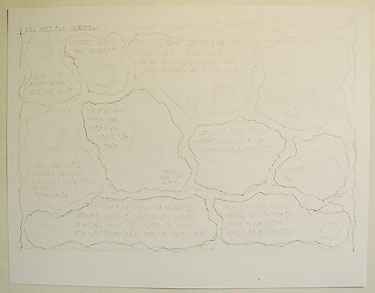
My first step after I write the script is a layout sketch. I sometimes do a scribbly 2-3" thumbnail of the page first to decide how many panels to put in each row, or if there will be a big drawing somewhere for emphasis, but then I do this version at close to the final print size.
The main purpose of this sketch is to fine-tune the layout, establishing pacing through the size and shape of the panels, and most importantly making sure that each panel is big enough to contain its dialog with some space for a drawing. I made the mistake a couple of times early on of underestimating the amount of space the words would take, and had to squeeze things later to make them fit. No fun.
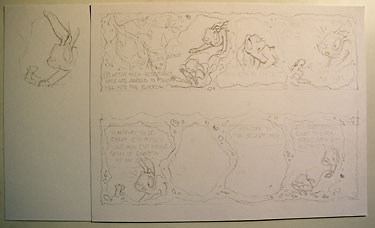
This was my first "underground" episode, and I had to figure out how to handle the word balloons. My first thought (at left) was to have the balloons float in front of the irregular panels, but when I was done it looked like a busy crowd of balloons rather than a logical ordering of panels. So I redid it, at right, with the balloons cropped to the edges. It took longer to make the final balloons this way, but legibility improved dramatically.
Panels
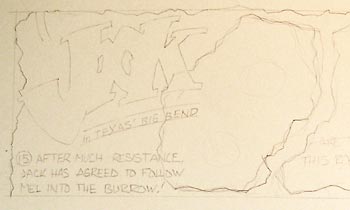
Next I draw the panel borders and rough in the type on the final sheets of paper. I use two sheets of 8.5 x 11" paper for each episode. I use a Georgia-Pacific card stock (Quantum Opaque) that has a surface very much like Bristol Board, but I could buy a ream (250 sheets) of this stuff for the price of a 20-sheet pad of good Bristol. It's not quite as archival, but what do I care? The finished piece is the comic, which includes type and tome added in the computer. The original drawings are just a byproduct along the way.
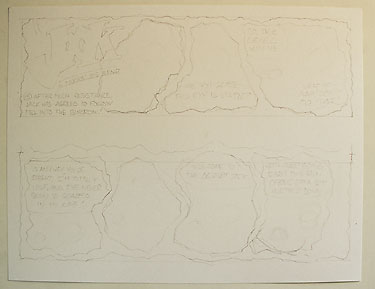
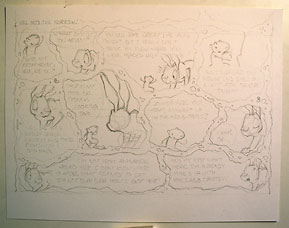
Usually I just split the page in half, but for this episode, the layout made more sense to break out the top and bottom rows onto one sheet, with the more interlocked center portion on the other.
Once again, the most important part of this stage is ensuring that the panels are large enough to hold the type, and that I know with reasonable accuracy what shape the word balloons will be. I rough in the wording on a light box, over a sheet of type printed at the appropriate size, so I can be sure I'm getting it pretty close.
I apologize that these are difficult to see, but this is drawn very lightly in the 2H pencil to make erasing easier when I'm done with the inking.
Sketching
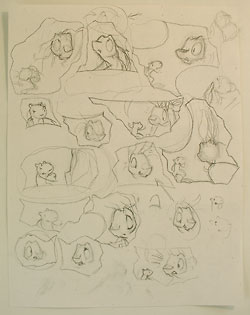

Only at this point do I really start to sketch out the characters. This is the single most difficult and time-consuming part of the whole process. Using the panel and word balloon sizes as a guide, I compose the drawing for each panel in the space that's left. I do most of this work in a sketchbook, but at the time I did these, I was almost out of pages in the current book, so I did a lot of sketching on the backs of scrap office paper. Using loose paper was easier for the "underground" parts since I could more easily trace the actual panel shape. Usually I just measure the panel size and get pretty close.
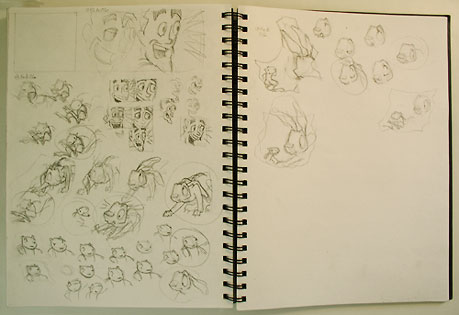
When sketching, I pay a lot of attention to the acting, getting the expressions right for the dialog, and making sure there's enough variety to keep it interesting to look at. When I'm doing an action episode, I may fill up a full sheet (or two or three full sheets) with sketches of a single panel or pose, trying to get it to feel just right. This episode came pretty easily. Facial expressions are a lot easier for me than action poses.
When it takes a few tries to get a panel element that works for me, I circle it so I know which one I liked best when it comes time to draw it for real.
Drawing

Once I've sketched out all the panel imagess, I start drawing them into the outlines I made before on the final paper.
In this particular episode, I had two panels that had almost the same drawing. At the far left, I've drawn that image separately so that it will fit both panel shapes. Once I scan everything I can drop it into both of the empty panels below and make the minor edits in Photoshop.
This drawing stage takes a tenth of the time that the sketching does, because all the decisions have already been made. I just refer to my sketches and reproduce them, which I can do very quickly because my hand has now done them all already, and it remembers how.
Some years of animation practice helps build this skill (as well as what skill I have for getting characters to look more or less the same from panel to panel). And as I've gained familiarity with these characters, it's become easier as well. Yup, nothing beats doing a whole lot of drawings for building up skill in drawing. It's funny that way.
Sometimes at this stage I still have to draw, erase, and redraw some of the parts a bunch of times, but it's nothing like the effort that goes into the sketching.
On to page two of "the article that just wouldn't end", starting with...Inking!